Table of Contents
As an Amazon Associate, we earn from qualifying purchases. This means we may receive a small commission at no extra cost to you when you buy through links on this page.
Why Cleaning Your Headphone Earcups Matters
We all love our headphones, but it’s easy to forget about the hygiene of those soft, comfy earcups. Regular cleaning isn’t just about aesthetics; it’s vital for your health, the quality of your listening experience, and the lifespan of your beloved headphones. Earcups accumulate a surprising amount of gunk – earwax, sweat, dead skin cells, makeup, and dust – creating a breeding ground for bacteria. This can lead to skin irritation and even ear infections, especially with prolonged use. Furthermore, debris build-up can subtly muffle the sound, reducing the clarity and depth of your audio. Finally, neglecting cleaning can cause the earcup materials to degrade faster, leading to cracking, peeling, or simply becoming less comfortable.
Identifying Your Earcup Material
The cleaning method you use depends heavily on the material of your earcups. Here’s a breakdown of the most common types:
- Protein Leather: Feels soft and luxurious, similar to real leather. Often used in higher-end headphones. Slightly porous.
- Faux Leather (Pleather): A synthetic alternative to protein leather. Often smoother and more plastic-feeling. Generally easier to clean than protein leather.
- Velour: A soft, fuzzy fabric. Offers excellent comfort but requires more delicate cleaning. Prone to trapping dust.
- Fabric: Typically a woven material, often used in more budget-friendly headphones. Can be washable, but requires caution.
How to identify: A simple touch test is usually sufficient. Real leather/protein leather will feel warmer and more pliable. Pleather will feel cooler and more plastic-like. Velour is obviously fuzzy, and fabric will have a distinct weave. If you’re unsure, check the manufacturer’s specifications.
Tools & Supplies You’ll Need (2026 Edition)
Here’s what you’ll need to get started. Good news: 2026 has brought some handy new tools to the headphone cleaning game!
- Microfiber Cloths: Essential for gentle wiping.
- Soft-Bristled Brush: For loosening debris. Look for brushes specifically designed for electronics.
- Sonic Cleaning Brush (New for 2026): Products like the SonicBrush Pro Headphone Cleaning Tool (£49.99) use sonic vibrations to dislodge dirt without damaging delicate materials.
- Isopropyl Alcohol: 70% concentration is ideal. Avoid higher concentrations as they can be too harsh.
- Mild Soap: Dish soap *specifically* designed for delicate items (avoid harsh detergents).
- Cotton Swabs: For reaching tight spaces.
- Small Vacuum Attachment: Useful for removing loose debris from velour and fabric earcups.
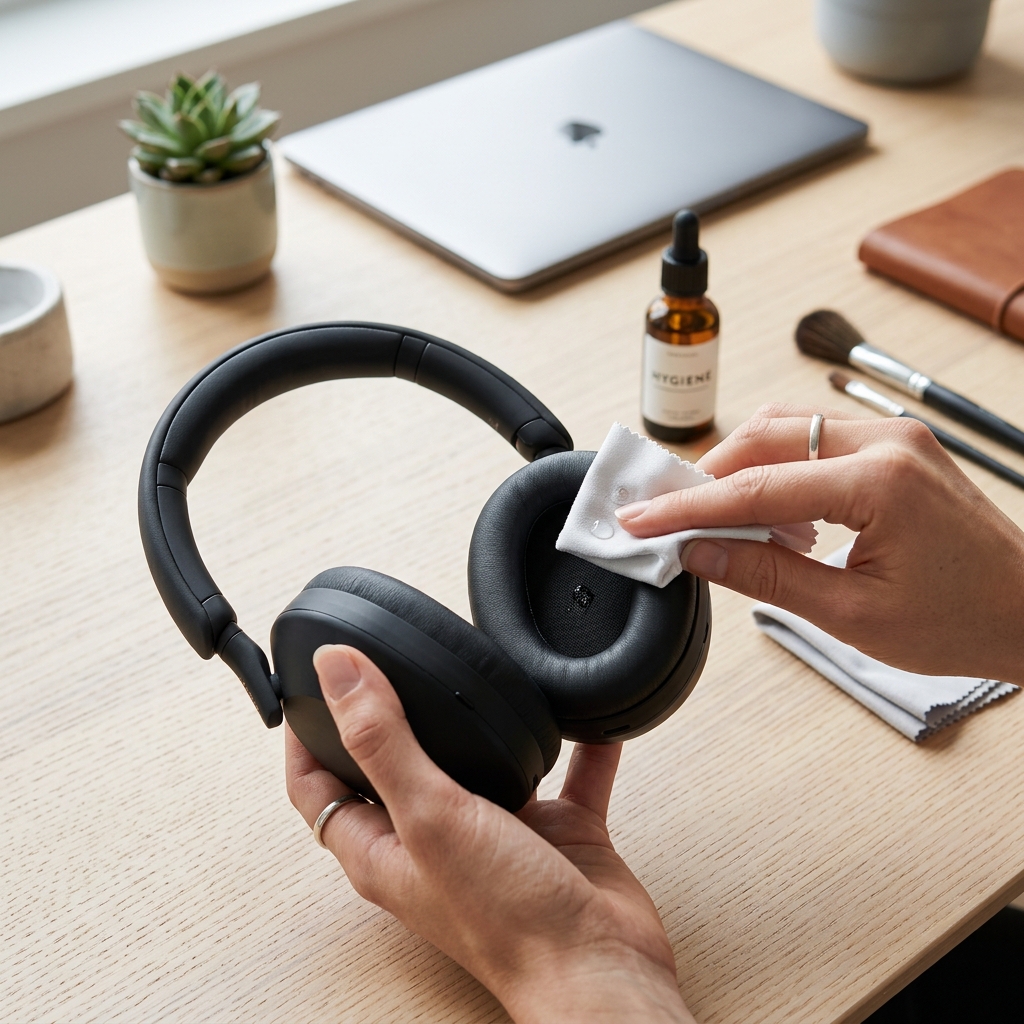
Cleaning Protein Leather & Faux Leather Earcups
These materials are relatively easy to clean, but require a gentle touch.
- Disconnect your headphones: Always unplug your headphones before cleaning.
- Remove Loose Debris: Use a soft brush or a dry microfiber cloth to remove dust and dirt.
- Prepare Cleaning Solution: Mix a small amount of mild soap with distilled water. Alternatively, lightly dampen a microfiber cloth with 70% isopropyl alcohol.
- Wipe Gently: Gently wipe the earcups with the damp cloth, avoiding excessive moisture.
- Remove Soap Residue: If using soap, wipe again with a clean, damp cloth to remove any residue.
- Condition (Protein Leather Only): Apply a small amount of leather conditioner (specifically for protein leather) to keep the material supple and prevent cracking.
- Air Dry: Allow the earcups to air dry completely before using your headphones.
Warning: Avoid harsh chemicals, abrasive cleaners, or excessive moisture. These can damage the material and void your warranty.
Cleaning Velour & Fabric Earcups
Velour and fabric require a more cautious approach. Dry cleaning methods are preferred.
- Remove Loose Debris: Use a lint roller or a small vacuum attachment to remove loose dust and particles.
- Brush Gently: Use a soft-bristled brush to gently loosen any remaining dirt.
- Spot Clean (If Necessary): For stains, mix a tiny amount of mild soap with water. Dampen a cotton swab and *gently* dab at the stain. Avoid soaking the fabric.
- Air Dry: Allow the earcups to air dry completely.
Important: Avoid getting velour or fabric excessively wet, as it can be difficult to dry and may damage the material. Testing on a small, inconspicuous area is always recommended.
Deep Cleaning vs. Quick Maintenance
A deep clean (as described above) should be performed every 1-3 months, depending on usage. Quick maintenance should be done daily or weekly.
Quick maintenance: Simply wipe down the earcups with a dry microfiber cloth after each use. This prevents buildup and keeps them looking fresh.
Cleaning Schedule:
| Cleaning Frequency | Task |
|---|---|
| Daily/Weekly | Wipe down with a dry microfiber cloth. |
| Monthly | Gentle wipe with a slightly damp microfiber cloth (using mild soapy water if necessary). |
| Every 3-6 Months | Full deep clean as described above. |
Dealing with Stubborn Stains & Odours
- Sweat Stains: Mix baking soda with a small amount of water to create a paste. Apply to the stain, let it sit for 15 minutes, then gently wipe away with a damp cloth.
- Makeup Residue: Use a makeup remover wipe (alcohol-free) to gently remove the residue.
- Unpleasant Odours: Sprinkle baking soda onto the earcups, let it sit overnight, then vacuum it off.
Preventing Future Buildup & Maintaining Cleanliness
- Headphone Covers: Consider using headphone covers, especially if you sweat a lot or wear makeup.
- Proper Storage: Store your headphones in a clean, dry place away from dust and direct sunlight. A Headphone Stand with UV Sanitizer (£39.99) offers both storage and sanitization.
- Regular Wiping: Make it a habit to wipe down your earcups after each use.
When to Replace Your Earcups
Sometimes, no amount of cleaning can restore earcups to their former glory. Here are some signs it’s time for a replacement:
- Cracking or Peeling: If the material is cracked or peeling, it’s time to replace them.
- Permanent Stains: If stains are deeply ingrained and cannot be removed.
- Loss of Shape: If the earcups have lost their shape and no longer provide a comfortable seal.
- Significant Wear and Tear: If the material is severely worn and uncomfortable.
Replacement Options:
| Product Name | Price (GBP) | Compatibility |
|---|---|---|
| Dekoni Audio Elite Velour Earpads (for Sony WH-1000XM5) | £69.99 | Sony WH-1000XM5 |
| Brainwavz HM5 Earpad Replacements (Various Models) | £24.99 | Multiple Models (Check Compatibility) |
| Cable Matters Headphone Cleaning Kit (2026 Edition) | £19.99 | Universal |
You can find replacement earcups from various retailers, including Dekoni Audio, Brainwavz, and Amazon. Always check compatibility with your specific headphone model before purchasing.
FAQ
How often should I deep clean my headphones?
Generally, every 1-3 months is sufficient, but it depends on how frequently you use them and the environment you use them in. If you use them daily in a dusty environment, you might need to deep clean them more often.
Can I use bleach to clean my earcups?
Absolutely not! Bleach is far too harsh and will likely damage the material and potentially your headphones. Stick to mild soap and water or isopropyl alcohol.
What’s the best way to clean velour earcups?
Dry cleaning methods are best for velour. Use a lint roller or a small vacuum attachment to remove loose debris. Avoid getting them wet whenever possible.
Will cleaning my earcups void my warranty?
Generally, no, as long as you use gentle cleaning methods and avoid harsh chemicals. However, it’s always a good idea to check your headphone manufacturer’s warranty terms and conditions.
Are sonic cleaning brushes worth the money?
Yes, especially if you have delicate earcups or want a more efficient cleaning process. The SonicBrush Pro (£49.99) offers a gentler, more thorough cleaning compared to traditional methods.